
Caster Wheels Added To Sawstop Contractor
My table saw needs to be mobile so I can put it away against the wall when I’m not using it. The existing products are expensive or don’t fully swivel. I came up with a cheap and convenient solution using flip-down casters.
My requirements
I needed the saw to spin in place, and to move forward and backwards so I could move it easily back against the wall. It should be quick and easy to move the saw in any direction, since different cuts need a different amount of space on each side.
Products I considered first
Super Duty All-Swivel Mobile Base with Table Saw Extension Combo PM-3795
- Full swivel. Expensive.
SawStop Contractor Saw Mobile Base MB-CNS-000
- Only one side swivels, so I’d have to parallel park my table saw every time.
What I bought
These retractable casters for roughly $40:
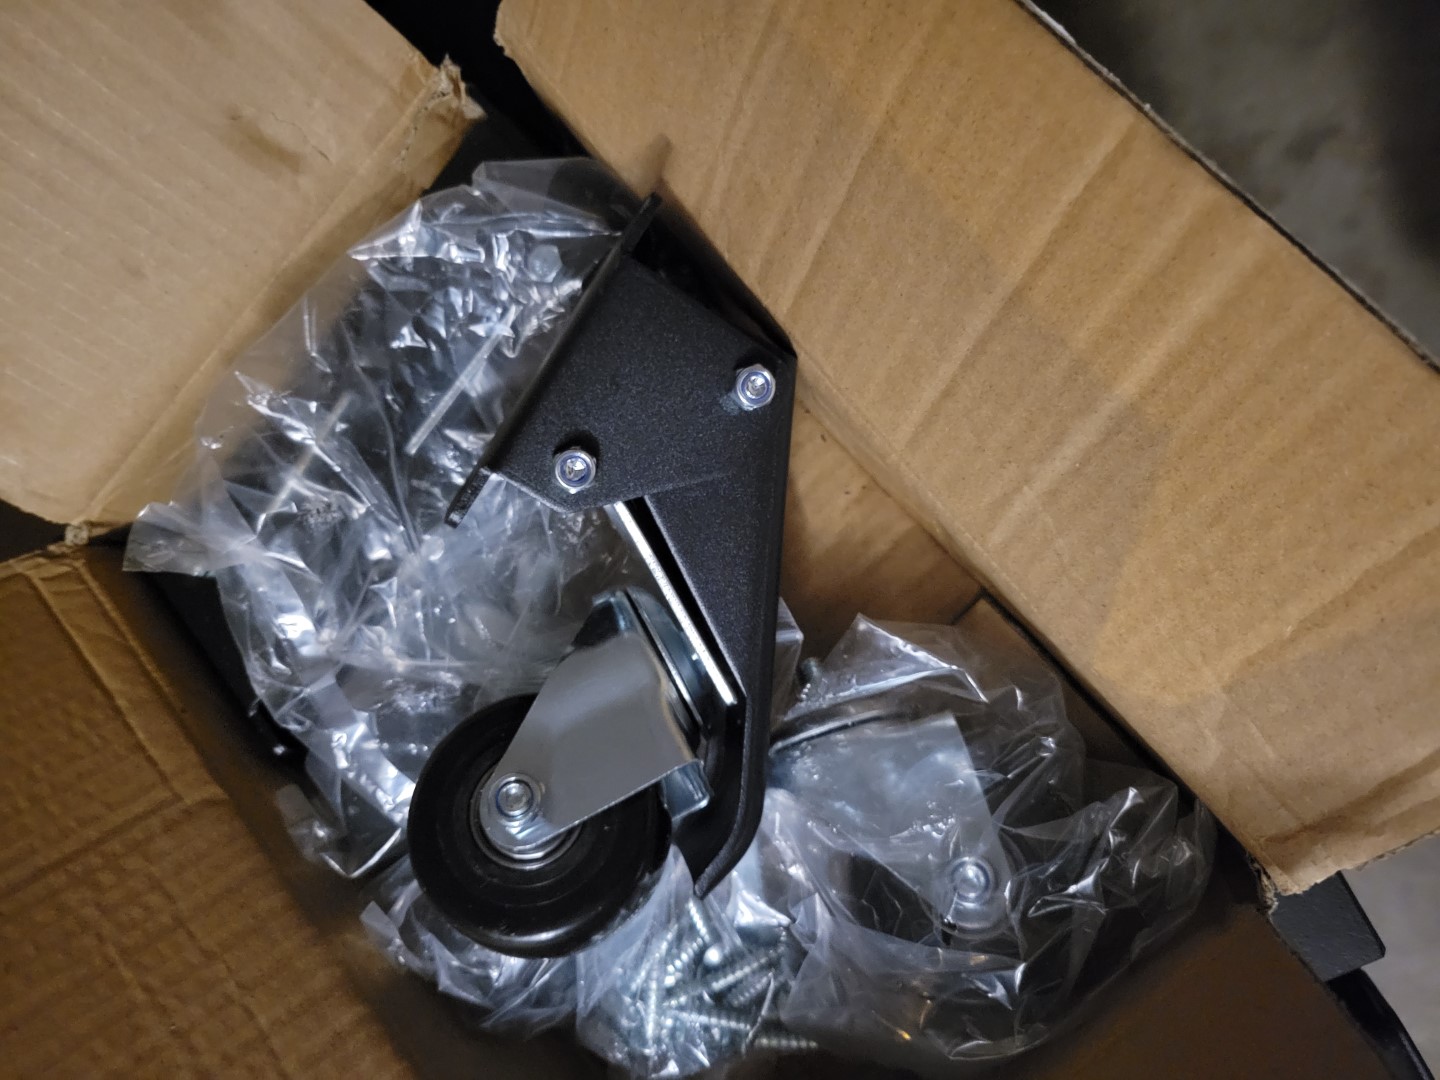
https://www.amazon.com/gp/product/B08BR7R4WN
How I installed
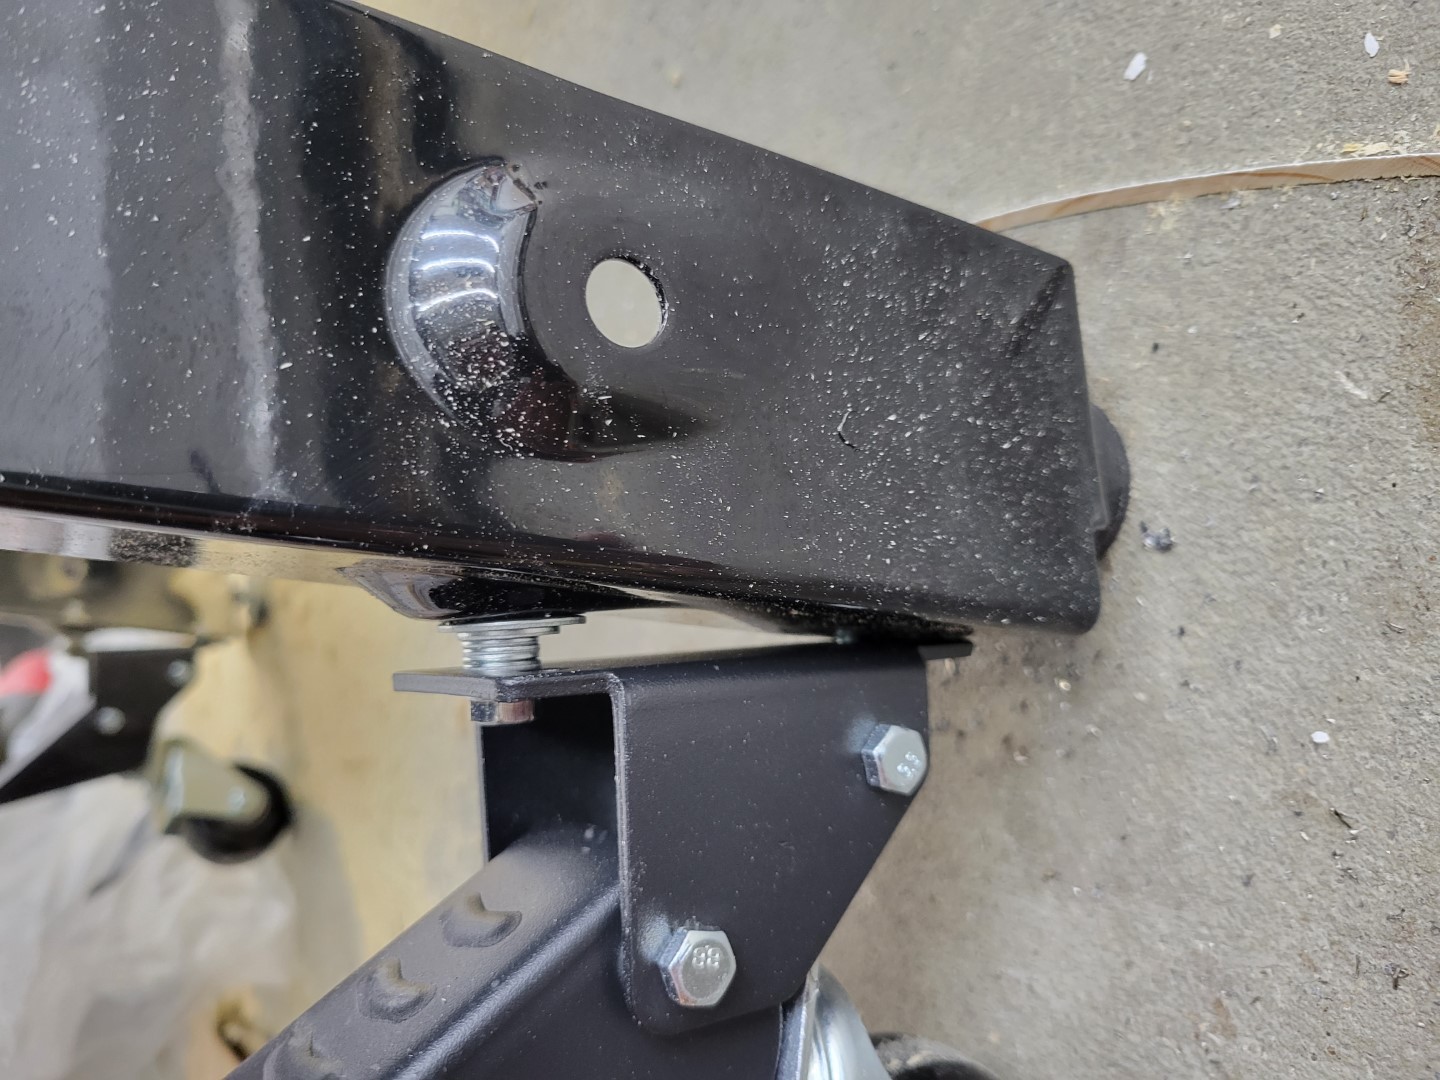
The casters came with a card with the mounting measurements. I lined these up to the saw legs and noticed that one of the holes almost lined up with an existing hole on the legs.
Before committing, I wanted to test that this height difference wouldn’t cause problems. Luckily, I still had the pallet from the saw. I installed the casters onto the pallet at the same height as the saw’s holes and tested the caster wheels with a wife-sized weight. Success! The pallet rolls and drops to the ground.
I ran to harbor freight for some bolts and washers. I popped my tire on my way there, but I saved $3!
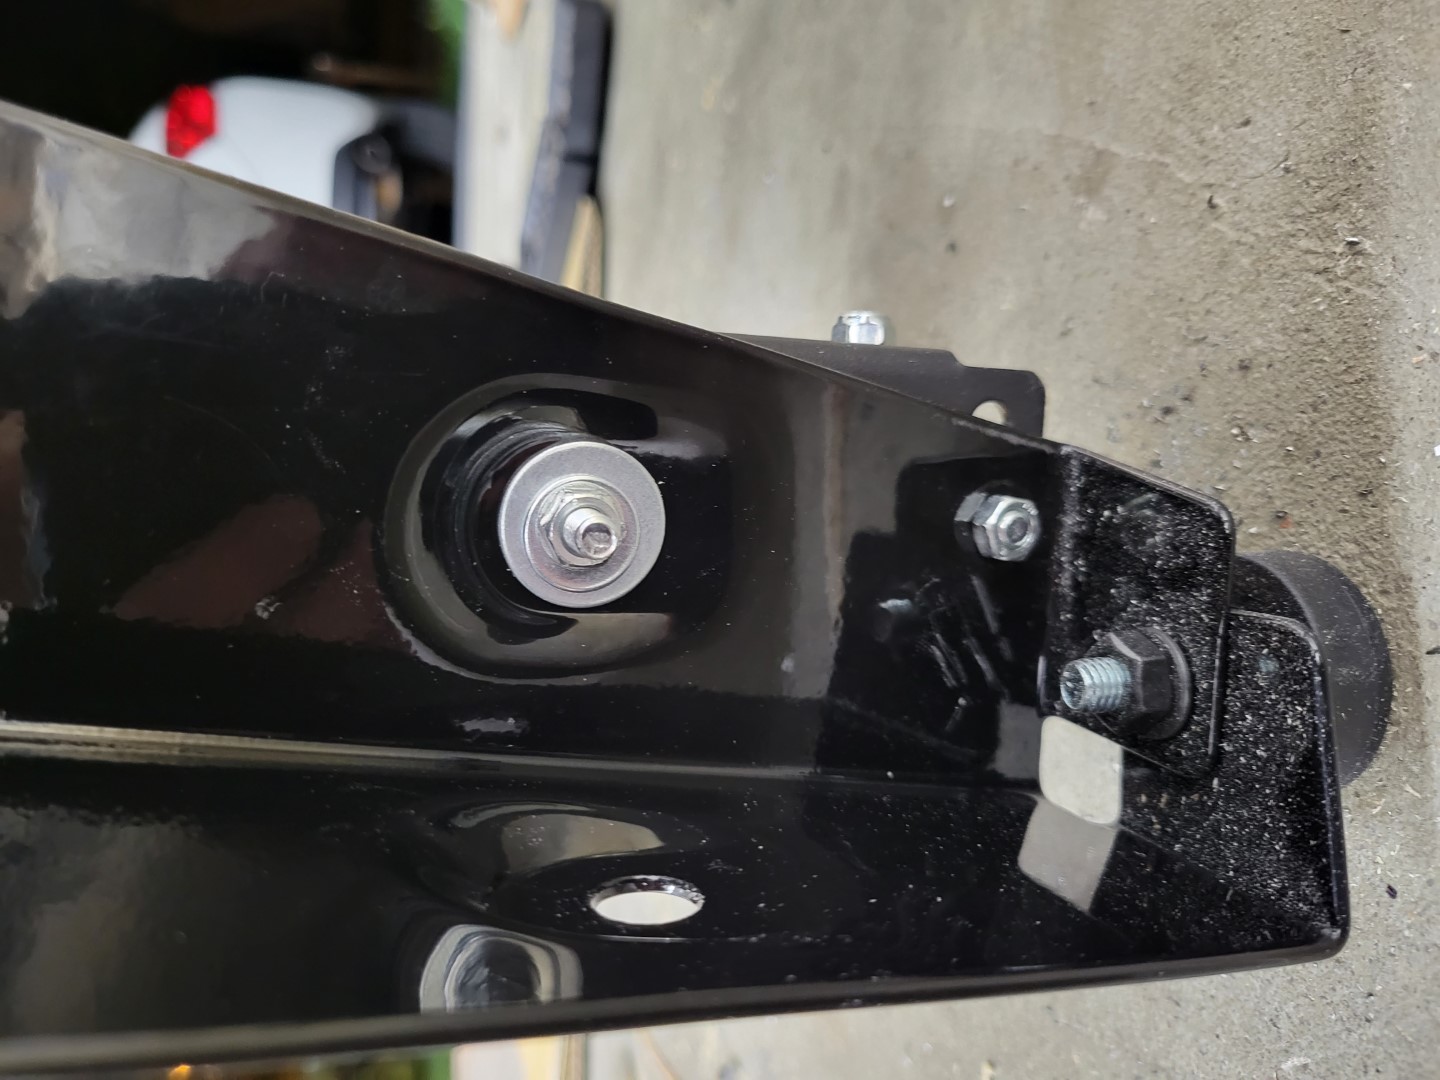
I drilled a second hole on the table saw legs. Stacked a handful of washers to account for the angle.
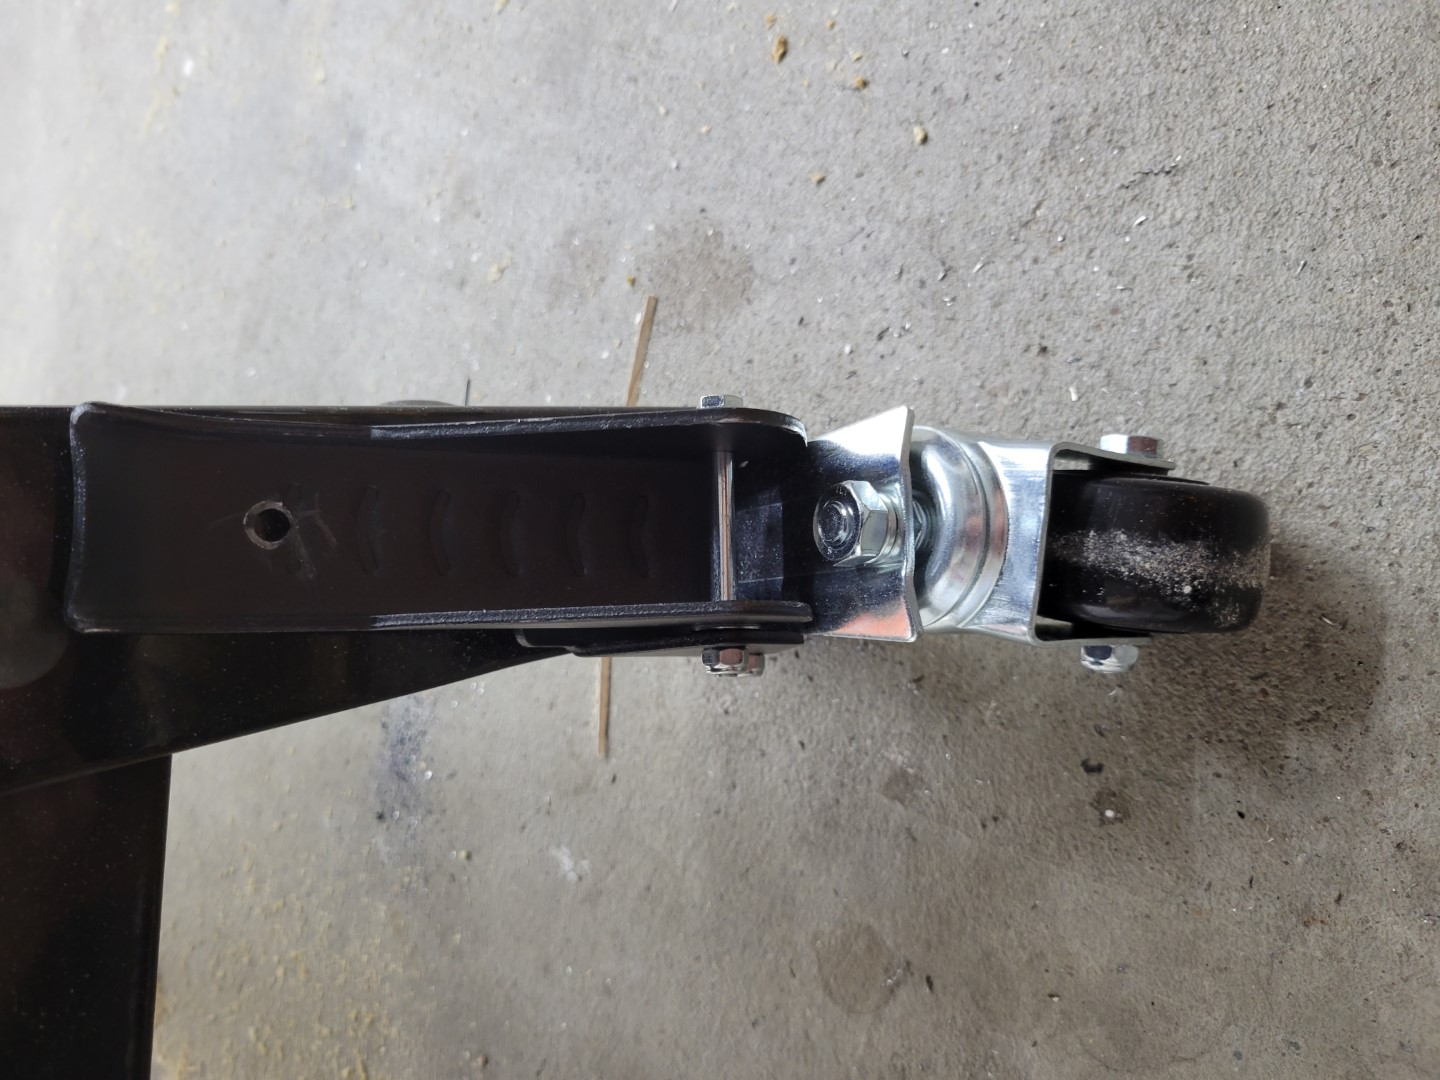
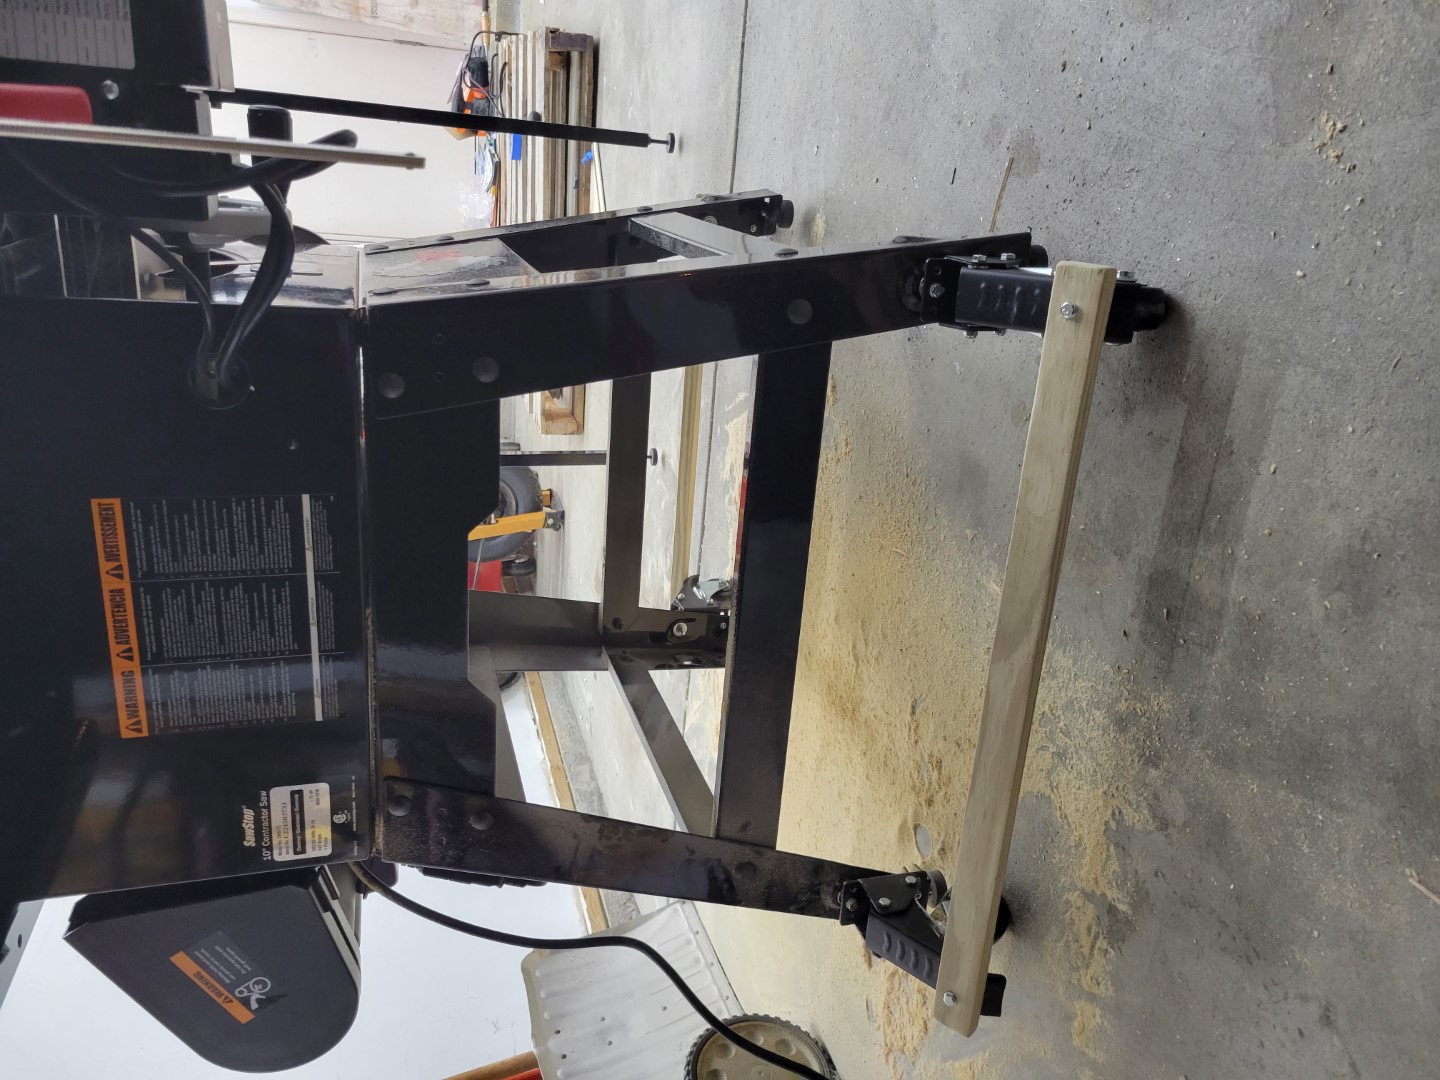
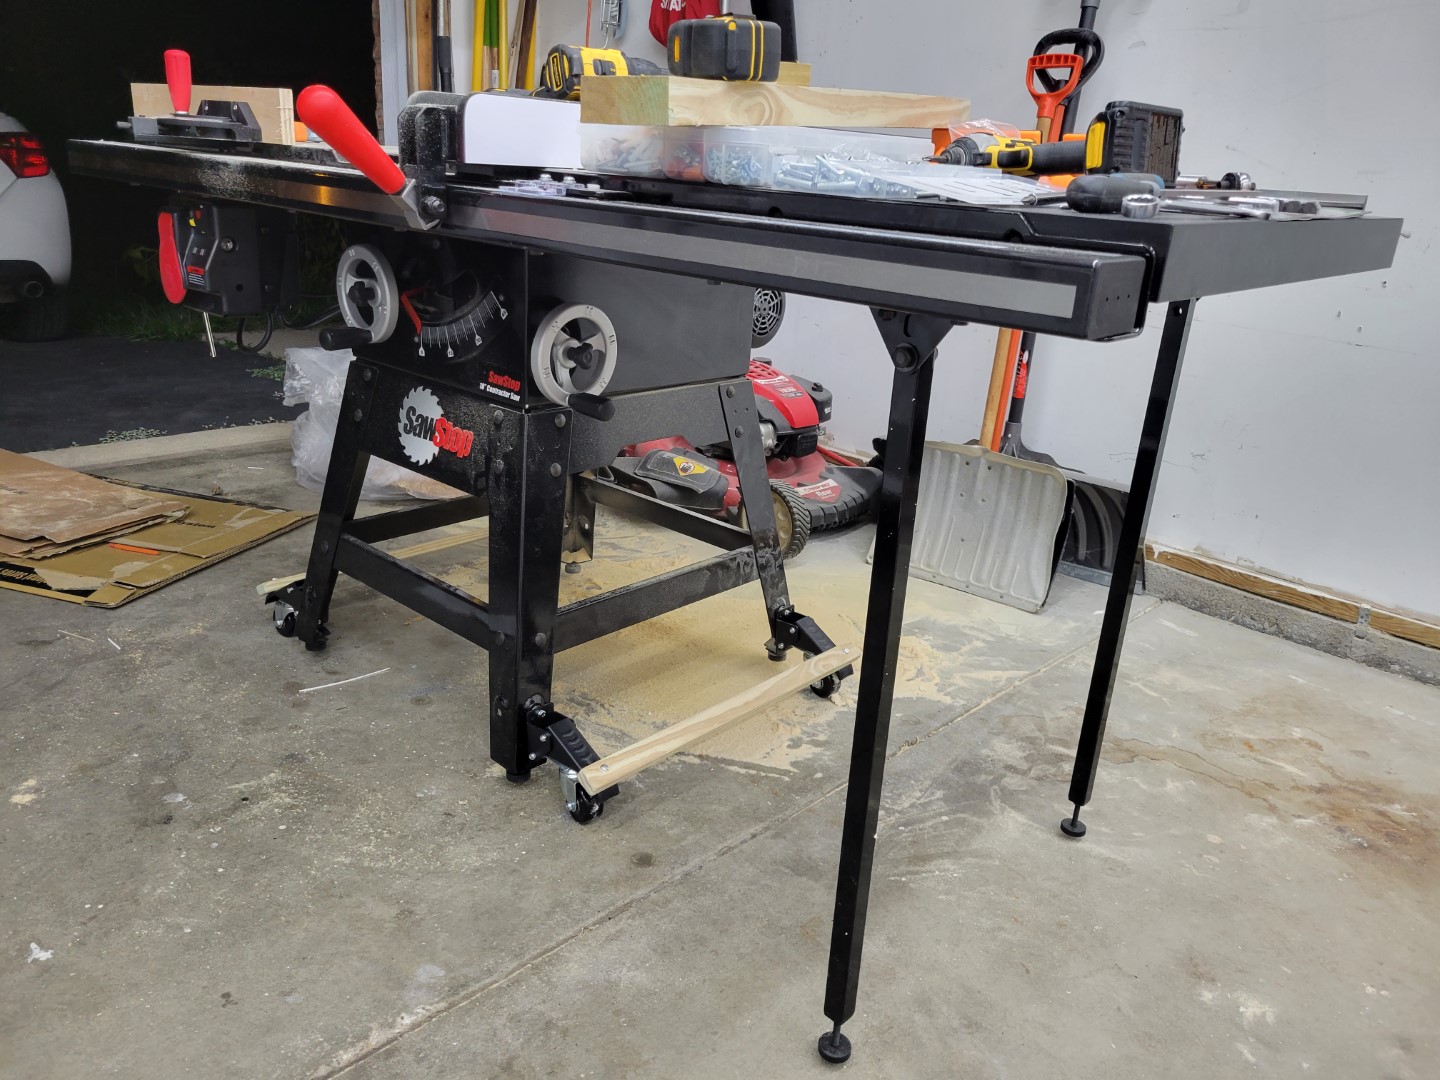
A few people recommended installing a cross bar across two of the wheels to make them more sturdy and make it easier to flip up and down with just one motion. This seemed like a good idea after trying all four casters one at a time. It felt flimsy with the table saw legs wobbling.
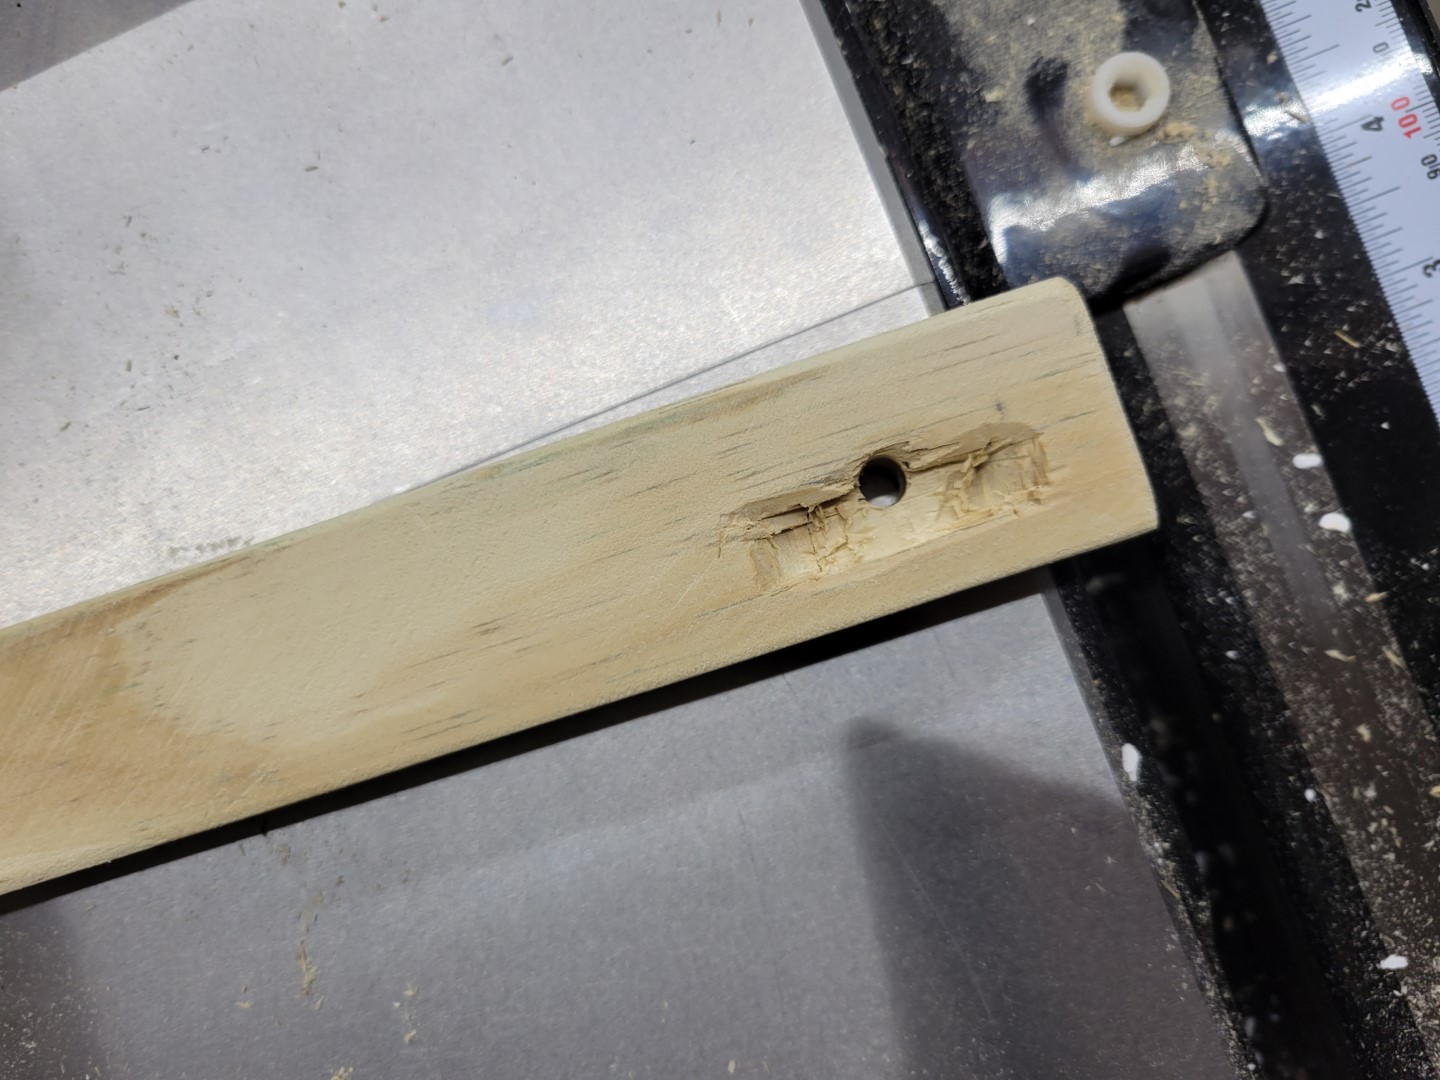
I ripped some scrap wood into roughly 1.25” x .75” and drilled through the wood and the caster pedal.

Lesson learned: Drilling through metal requires spinning the drill very slowly. Too fast, and the drill bit heats up and loses its edge very quickly. Also, you need firm pressure, but more can bend the sharp edge and ruin it. Harder and faster is not the answer here.
Also learned how to sharpen a drill bit. An electric sander with paper that can handle metal can fix a useless drill bit, at least enough to get this job done.
The pedal has ridges which cause my bar to wobble front to back. Some precise chisling created a recess for the ridge and got the bar to sit flat.
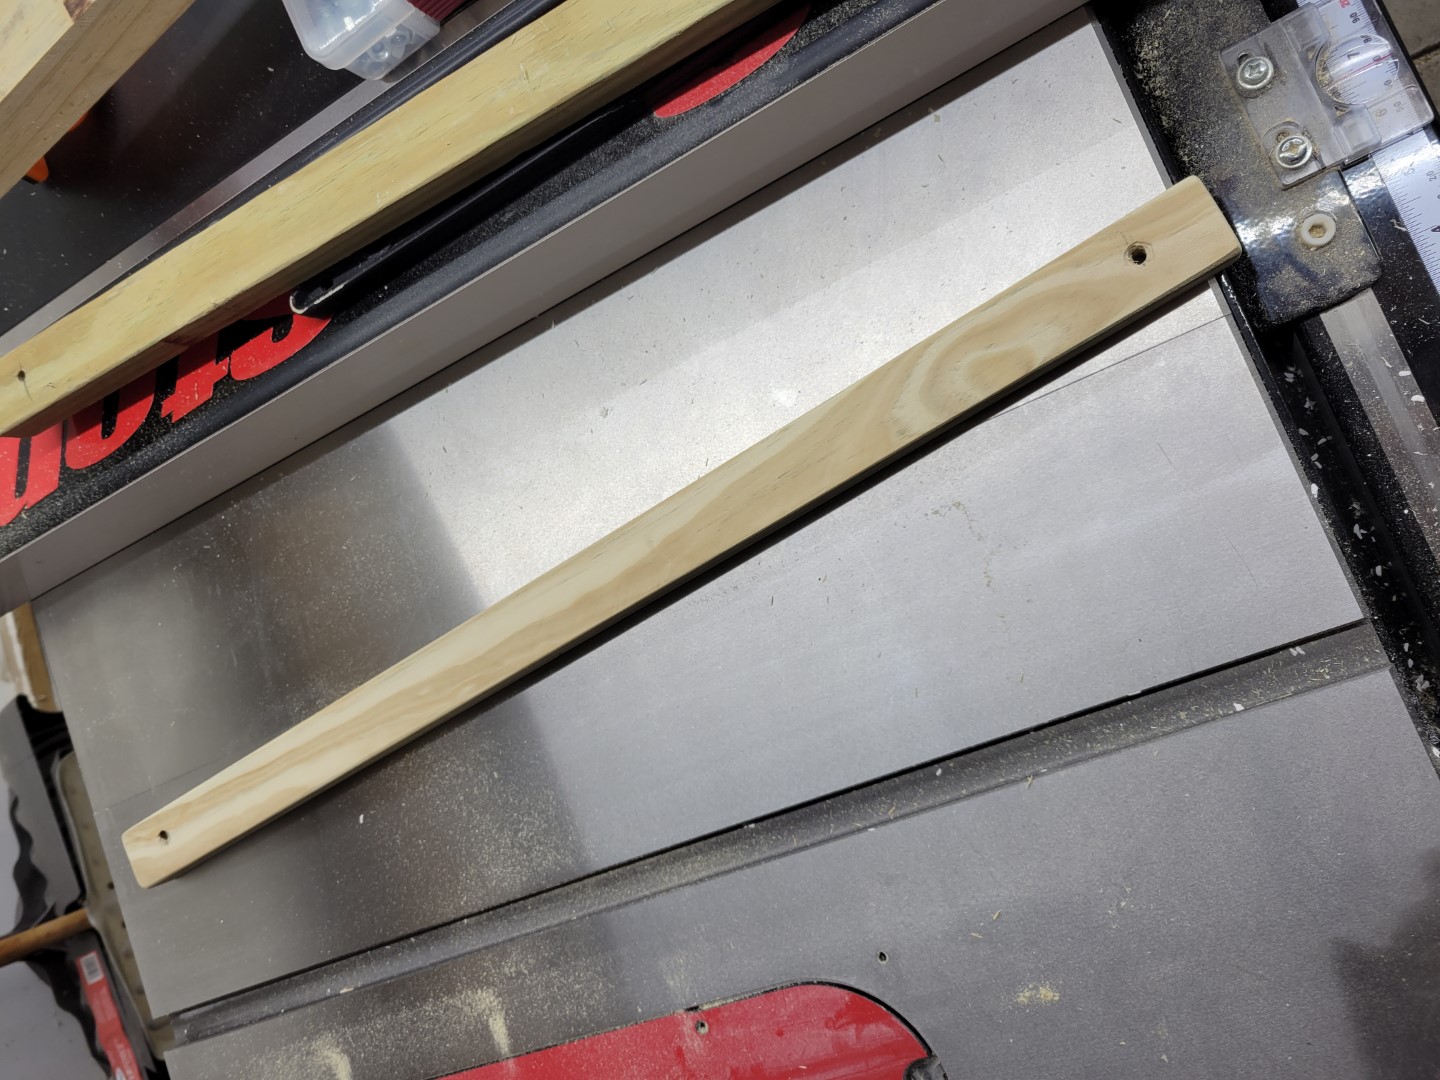
Some sanding for that professional touch, and the bar attached with a few bolts.
Thoughts
Overall, I’m very happy with this. It took longer than expected (what project doesn’t?) but a lot of that was figuring out how to do this.
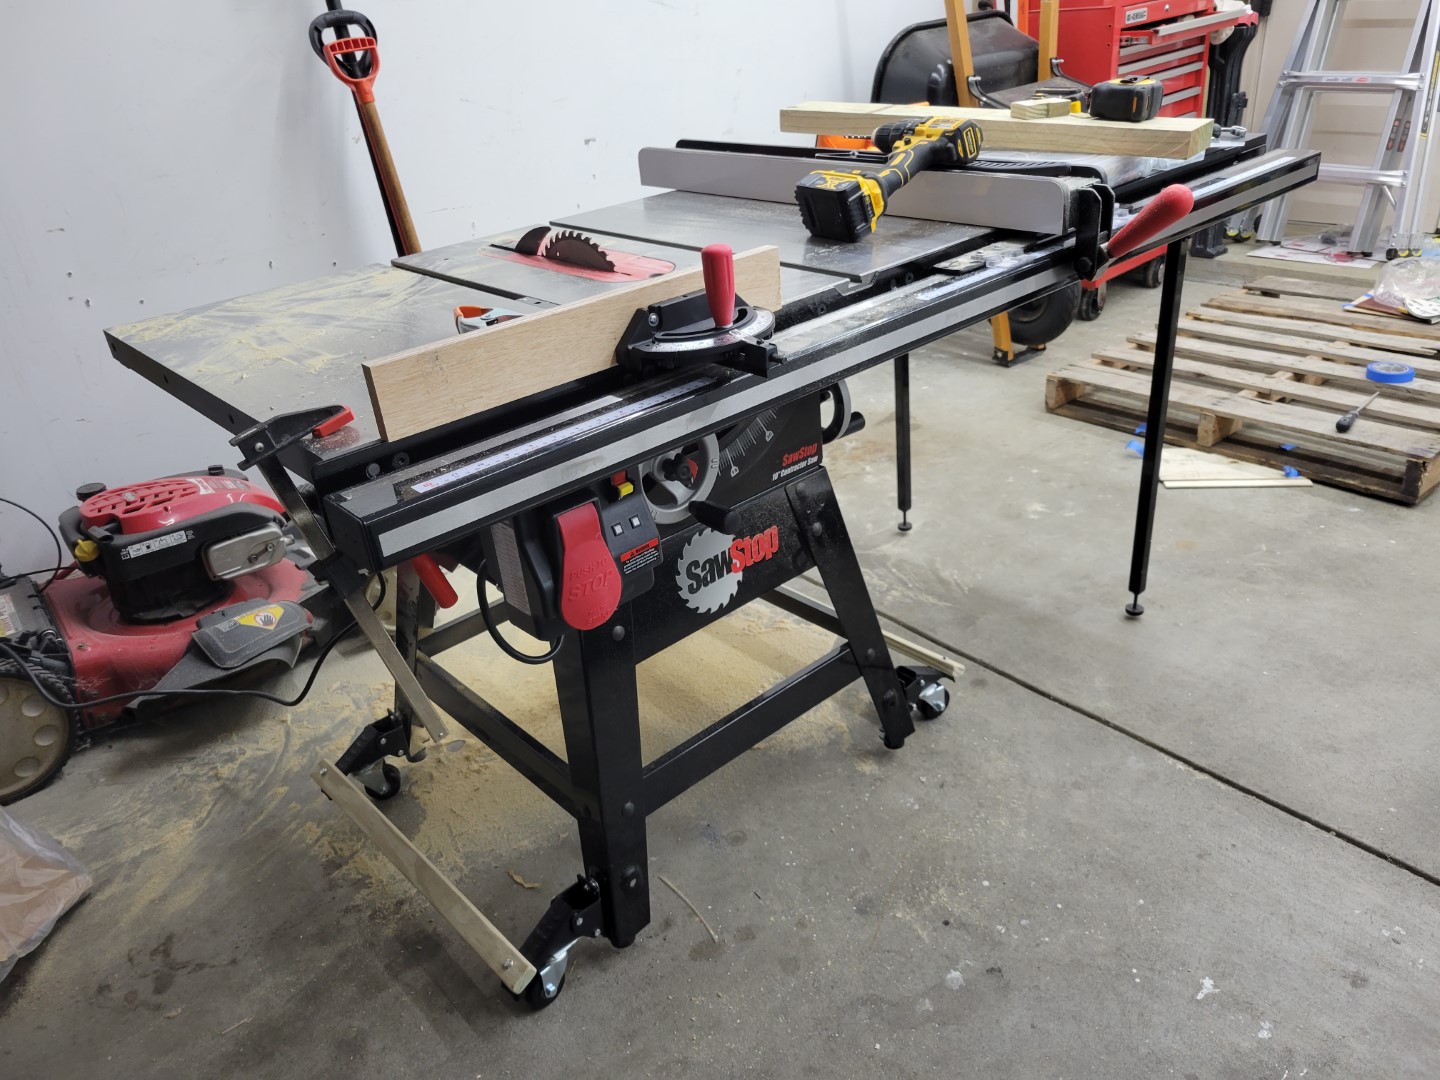
The saw swivels, I can push it back against the wall, and I can pull it back out.
To put the legs up or down, I have to do one side at a time, reach in with one foot, and lift the saw with my arms while pushing/pulling the cross bar in the center with my foot.
The extension legs dangle with the wheels down, but I’ve found they aren’t too important anyway. With my uneven garage floor, four wheels is probably best.
The cross bar definitely makes the whole thing more stable, and much quicker to raise and lower. I would hate to reach the back caster with the saw against the wall.
In the up position, the pedal cross bar sits almost flush to the saw leg cross bar. This makes it annoying to pull away and step down on it when I’m lifting the saw and can’t see below. I might add a spacer to the top of the pedal cross bar to keep them apart.